While doing project 2, I have researched some videos on some of the principles of animation.
This video explains the 'follow through and overlapping action' principle briefly.
This video explains the 'Arcs' principle briefly.
Friday, 24 February 2012
Project 2: Reflection
Reflection:
At first, I do not know anything about animation at all. It was when I started to do those lab exercises on Olive, which really helped a lot as they are step-by-step videos, then I understand what animation was about. After doing those lab exercises, it makes me want to learn more about animation.
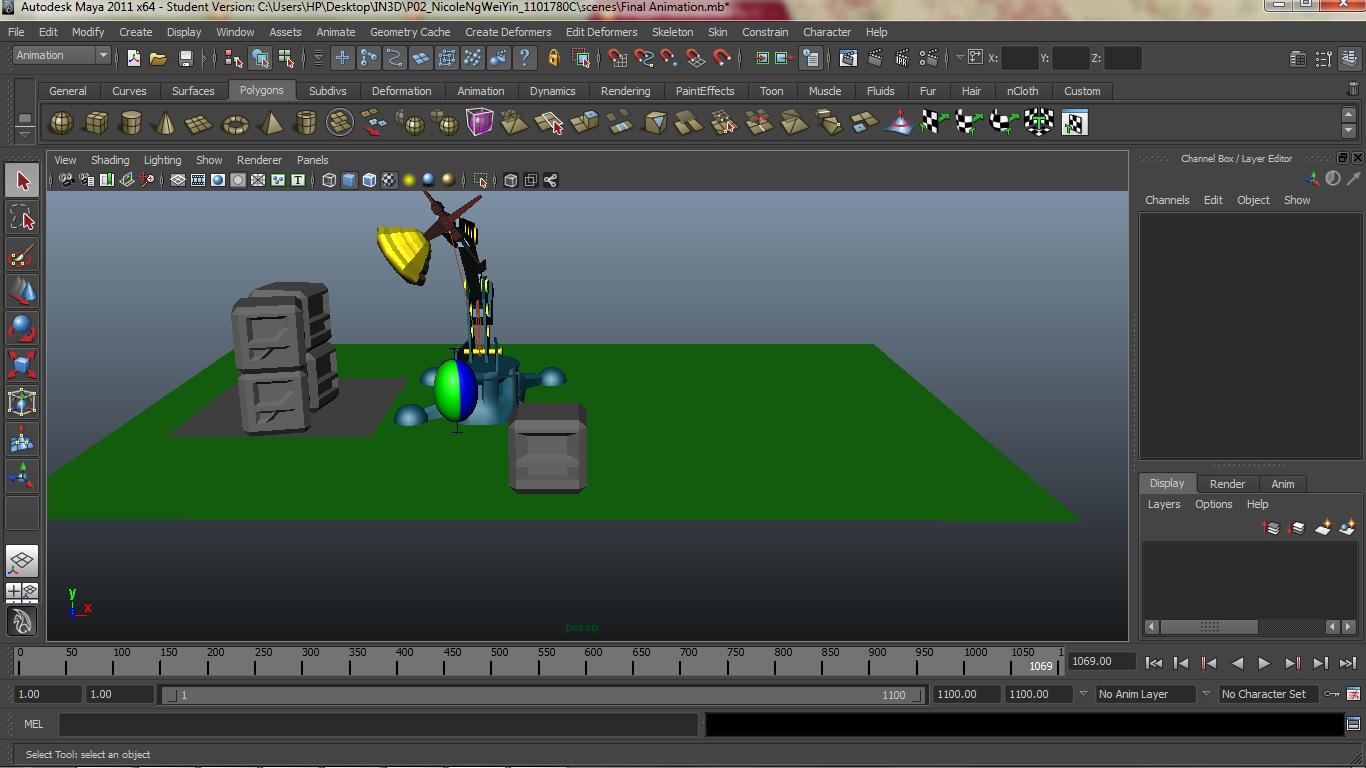
I would say that my animation is quite good though there are rooms for improvements. I did not expect that my animation will be a success because what I initially thought was an animation video with lots of errors, and I once thought that even with those errors, I intend to submit just like that. I did not expect my animation to be that long either (1100 frames = approximately 46 seconds). But I guess two of the reasons why I do not want to hand in a sloppy work are - I want to move on to Year 2 and do not want to retake and I do not want to waste my teacher's effort in teaching so hard.
I feel that Mr Ken Loh is one of the teachers I have seen being so dedicated to his students and enjoying his job so much. Sometimes during midnight, when you email or post comment on the facebook wall, he replies quite fast and this is what most of us want to, so that we can move on with our work quickly. Even on Chinese New Year's Eve he is also busy replying emails and comments. He is indeed one good teacher, who never gives up on his students, even on lazy students.
Overall, I think my animation for this project 2 is very complicated but it is still manageable. If I have more time to do my animation, of course I will try to do a better one than this.
At first, I do not know anything about animation at all. It was when I started to do those lab exercises on Olive, which really helped a lot as they are step-by-step videos, then I understand what animation was about. After doing those lab exercises, it makes me want to learn more about animation.
I would say that my animation is quite good though there are rooms for improvements. I did not expect that my animation will be a success because what I initially thought was an animation video with lots of errors, and I once thought that even with those errors, I intend to submit just like that. I did not expect my animation to be that long either (1100 frames = approximately 46 seconds). But I guess two of the reasons why I do not want to hand in a sloppy work are - I want to move on to Year 2 and do not want to retake and I do not want to waste my teacher's effort in teaching so hard.
I feel that Mr Ken Loh is one of the teachers I have seen being so dedicated to his students and enjoying his job so much. Sometimes during midnight, when you email or post comment on the facebook wall, he replies quite fast and this is what most of us want to, so that we can move on with our work quickly. Even on Chinese New Year's Eve he is also busy replying emails and comments. He is indeed one good teacher, who never gives up on his students, even on lazy students.
Overall, I think my animation for this project 2 is very complicated but it is still manageable. If I have more time to do my animation, of course I will try to do a better one than this.
PROJECT TWO: SELF CRITIQUE

Overall, I think my animation was quite well done than what I expected. Before doing this project 2, I was kind of lazy to do it and thinking that my animation will turn out lousy. After doing it, it gives me a sense of satisfaction and I was taken aback by my final animation result.
There are some of the principles of animation I used in my project 2, namely Squash & Stretch, Anticipation, Timing, Secondary Actions, Exaggeration, Ease in & Out. There may be other principles of animations in my video that I did not list out.
Squash & Stretch
In my animation, the ball bounces up and down. While the ball is bouncing, the ball stretches when it is in the air, and it becomes squashed when it is on the ground.

Stretched

Squashed
Anticipation
The robot is annoyed upon seeing the ball. The robot intends to whack away the ball. Before the robot whacks away the ball, it will move a bit backwards so that it shows anticipation. For example, a runner need to bend his knees before running. A similar theory applies here.

Timing
I think my animation has a good timing because my robot lifts up and put down the box at the pile at the right timing. An example of a bad timing is putting the box at the pile while the ball bounces in because that does not fits my scenario 3.
Secondary Actions
In my animation, they are secondary actions. For example, when the robot sees the ball, it feels annoyed, so it has an annoyed feeling shows by the arm; it moves back and forth.


Exaggeration:
In my last part of my animation, the ball appears for the second time and it feels excited and happy because it thinks that this is some sort of a game. So the ball moves up and down repeatedly to show that it is happy.


During the process of animating, I faced some problems. There is one part where you need to constrain>parent the box, moving one frame in front and blend parent 0 it; I did not do that for my second box, hence it turns out and the later part of my animation, the other boxes stick to the robot arm. I did not figure that out at first, so I re-do my whole animation.
Also, as the duration of my animation grew longer, I often clicked the wrong frames because the frames get thinner and thinner. And when I undo the wrong part I have clicked, I sometimes forget I have already undone that and hence, I will think that my animation has gone somewhere wrong when in fact nothing has gone wrong at all. As a result, I restart my Maya and start again from where I previously saved.
While facing all these problems, I looked up the facebook group and a blog created by our lecturer, Mr Ken Loh and follow his detailed steps. Especially the blend parent function, I looked up his blog and I figured out how to do it. Also, I asked some of my classmates and in this way, we can learn from one another's mistakes.
The lab materials on Olive also helped a lot as it shows step-by-step process of animation. In just 4 weeks of animation, we can learn so many things, and in fact, most of the basic animating skills are taught there. Also, with the help of our lecturer, Mr Ken Loh, I was able to successfully finish my animation. In my opinion, I think he is one of the teachers I have seen that enjoyed his job and is dedicated to the students, which also gives me the determination to finish my project.
This is the animation video I have done for project 2.
Thursday, 16 February 2012
Week 13: Exercise 2
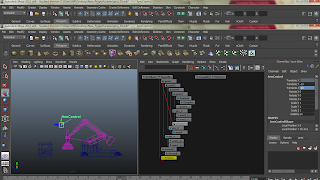
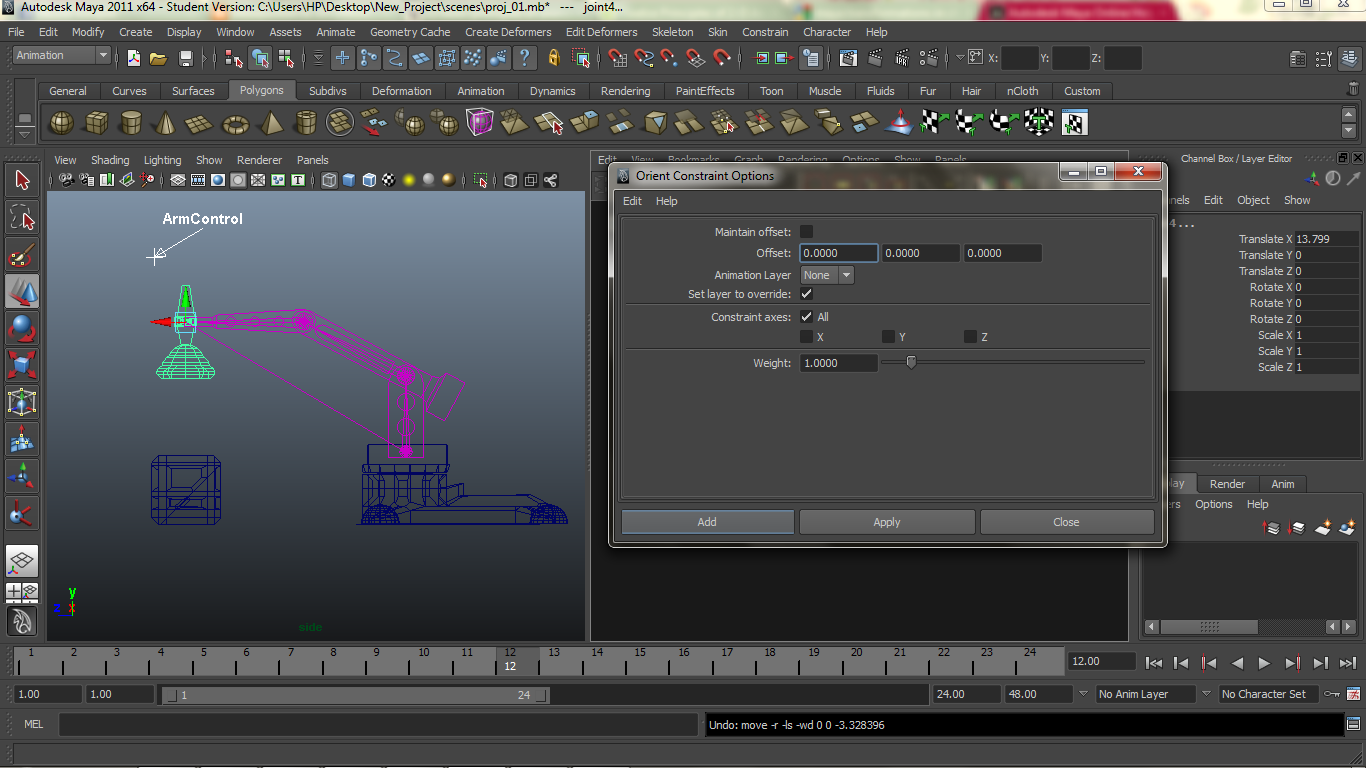
This is what I have done in week 13 for exercise 2.


Reflection:
Overall, I think this exercise is quite difficult to me. But without this rig, I can't start my animation. Therefore, even though how difficult it is, I've managed to finish it.


Reflection:
Overall, I think this exercise is quite difficult to me. But without this rig, I can't start my animation. Therefore, even though how difficult it is, I've managed to finish it.
Friday, 10 February 2012
Research: The first animated film.

The first animated film was El Apóstol, made in 1917 by Quirino Cristiani from Argentina. He also directed two other animated feature films, including 1931's Peludopolis, the first to use synchronized sound. None of these was successful. The earliest successful animated feature, which used colour-tinted scenes, is the silhouette-animated Adventures of Prince Achmed (1926) directed by German Lotte Reiniger and French/Hungarian Berthold Bartosch. Walt Disney's Snow White and the Seven Dwarfs (1937) is often considered to be the first animated feature when in fact at least eight were previously released. However, Snow White was the first to become successful and well-known within the English-speaking world and the first to use cel animation.
First successful feature film - Snow White & the Seven Dwarfs
Research: What are the principles of Animation?

In animation, you need some principles of animation to produce a good animation video.
What are the principles of Animation?
There are 12 basic principles of animation, namely Squash & Stretch, Anticipation, Staging, Straight Ahead action and pose to pose, Follow through and overlapping action, Slow in and slow out, Arcs, Secondary action, Timing, Exaggeration, Solid drawing and lastly, Appeal.
a. Sqaush & Stretch
Squash & Stretch is said to be the most important principle because it gives a sense of flexibility and weight to a drawn object. For example, it can be applied to a normal bouncing ball or expressions of a human face. Taken to an extreme point, a figure stretched or squashed to an exaggerated degree can have a comical effect.
b. Anticipation
Anticipation is used to prepare the audience for an action, and to make the action appear more realistic. For example, an athlete needs to move back a bit before taking off from the starting point of a marathon and a dancer needs to bend her knees before jumping off the ground.
c. Staging
The purpose of the principle Staging is to direct the audience's attention, and make it clear what is of greatest importance in a scene; what is happening, and what is about to happen. The essence of this principle is keeping focus on what is relevant, and avoiding unnecessary detail.
d. Straight Ahead action and pose to pose
These are two different approaches to the actual drawing process. "Straight ahead action" means drawing out a scene frame by frame from beginning to end, while "pose to pose" involves starting with drawing a few key frames, and then filling in the intervals later.
e. Follow through and overlapping action
These closely related techniques help render movement more realistically, and give the impression that characters follow the laws of physics. "Follow through" means that separate parts of a body will continue moving after the character has stopped. "Overlapping action" is the tendency for parts of the body to move at different rates. A third technique is "drag", where a character starts to move and parts of him take a few frames to catch up. These parts can be such as the parts of the body, such as arms or hair.
f. Slow in and slow out
The movement of the human body, and most other objects, needs time to accelerate and slow down. For this reason, animation looks more realistic if it has more drawings near the beginning and end of an action, emphasizing the extreme poses, and fewer in the middle.
g. Arcs
Animation should adhere to this principle by following implied "arcs" for greater realism. This can apply to a limb moving by rotating a joint, or a thrown object moving along a parabolic trajectory. The exception is mechanical movement, which typically moves in straight lines.
h. Secondary action
Adding secondary actions to the main action gives a scene more life, and can help to support the main action. For example, a person walking can simultaneously swing his arms or keep them in his pockets or he can speak or whistle. The important thing about secondary actions is that they emphasize, rather than take attention away from the main action.
i. Timing
Timing refers to the number of drawings or frames for a given action, which translates to the speed of the action on film. On a purely physical level, correct timing makes objects appear to abide to the laws of physics; for instance, an object's weight decides how it reacts to an impetus, like a push.
j. Exaggeration
Exaggeration is an effect especially useful for animation, as perfect imitation of reality can look static and dull in cartoons. The level of exaggeration depends on whether one seeks realism or a particular style, like a caricature or the style of an artist. The classical definition of exaggeration was invented by Disney.
k. Solid drawing
The principle of solid drawing means taking into account forms in three-dimensional space, giving them volume and weight.
l. Appeal
The principle Appeal is also important as a dull animation will not attract much viewers. Appeal in a cartoon character corresponds to what would be called charisma in an actor. A character who is appealing is not necessarily sympathetic — villains or monsters can also be appealing — the important thing is that the viewer feels the character is real and interesting
Research: What is Animation?

Animation is the rapid display of a sequence of images of 2D or 3D model positions or artworks in order to create an illusion of movement. Short to say, animation is the process of images moving. Each image is shot on film one at a time and is shown at the rate of 24 frames per second (fps) making the pictures appear to move.
The reason our eyes are tricked into seeing movement can be explained by the 'Persistence of Vision' theory. Our brain holds onto an image for a fraction of a second after the image has passed. If the eye sees a series of still images very quickly one image after another, then the images will appear to move because our eyes cannot cope with fast-moving images - our eyes have been tricked into thinking they have seen movement.
There are many types of animation, namely Hand-drawn animation, Stop Motion, 2D animation, 3D animation and many more.
Week 12: Part 8
In part 8, I've learnt basic squash settings and more detailed adjustments to the graphs in graph editor.


For translate Y, select the 'scale' tool to move the graph.

Like Translate X, delete the center keyframe for Rotate Z.

Put in -360 in the Stats box to allow the ball to rotate 360degrees forward while bouncing.

At the end of the video, it teaches us how to squash the ball by creating deformers>nonlinear>squash.
Reflection:
I think the tutorial has start to become more interesting as I've always wanted to learn the squash effect as it is one of the principle of animation.
Thursday, 9 February 2012
Week 12: Part 7
In part 7, I have successfully learnt how to animate a basic bouncing ball.


In this part, I need to select Translate Y in the graph editor and modify the graph by holding down the middle mouse wheel.

The ball needs to move in constant velocity. So i delete the middle keyframe for Translate X.

By freeing tangents, I am able to stretch the lines on the graph to give it a nice and smooth graph.

This is the result of freeing tangents.
This is the video of the bouncing ball.
Reflection:
This video helps me a lot. It teaches me the usage of graph editor. Next time, I don't have to animate them in different view panels one by one; i can use this graph editor to determine how my ball wants to move.
Week 12: Part 6
In part 6, I've learn how to start animating the ball moving up and down with the keyframes.


Lock all except Translate X, Translate Y and Rotate Z.

Set those properties at frame 1 by pressing 's'.

At frame 24, I move the ball to touch the ground. As the playback was not that smooth, I right click the timeline and under playback speed, I choose 'Play Every Frame, Max Real Time.'

At the end of this video, at frame 48, I move the ball out of the camera view. But in actual fact, I want the ball to be bouncing, not just moving up and down. The bouncing of the ball will be taught in part 7.
Reflection:
In this video, I have to be very careful because I think at the start of the animation, it is the most critical part. If the start of the animation was not done well, I will regret if I want to change any of the things now at the later part of animation.
Week 12: Part 5
In part 5, I've learnt bump mapping and setting important stuff for the rotate tool.


In this part, I've bump mapped the ground, using a bump map image.

After bump mapping the ground, I set the bump depth to 0.2 to make the ground look nicer.

I freeze transformations for the ball.
Reflections
I do not understand the part where they change the settings for the rotate tool. It seems the same for me before and after I change the settings. Overall, I think this video is manageable.
Week 12: Part 4
In Part 4 of 13, I've learnt how to put textures on the sphere and the plane. Textures used are blinn and ramp shader for the sphere and for the plane, I used an image provided and texture it.


In this part, I used Blinn on the sphere. For this case, I need to make the sphere look like a plastic ball.

The next part, the video teaches us how to use ramp shader for the sphere. It allow us to choose my own colours for the ball like the screenshot above.

For the plane, I've use a diffuse map image for the plane. The plane is a ground for the ball to roll on.
Reflection:
This video teaches me a lot of texturing for the polygons. I like the blinn texture because it allows you to adjust to the material you want. Overall, i think this part 4 video is manageable.
Week 12: Part 3
I've learnt how to set some important camera settings to my project file and assign material, Blinn, to the sphere.


Reflection:
I think this video has taught me more about the camera settings and the assign new material part was also taught in class but I never really pay attention. (sorry D: ) So this video was like a fun experience for me!
Subscribe to:
Comments (Atom)